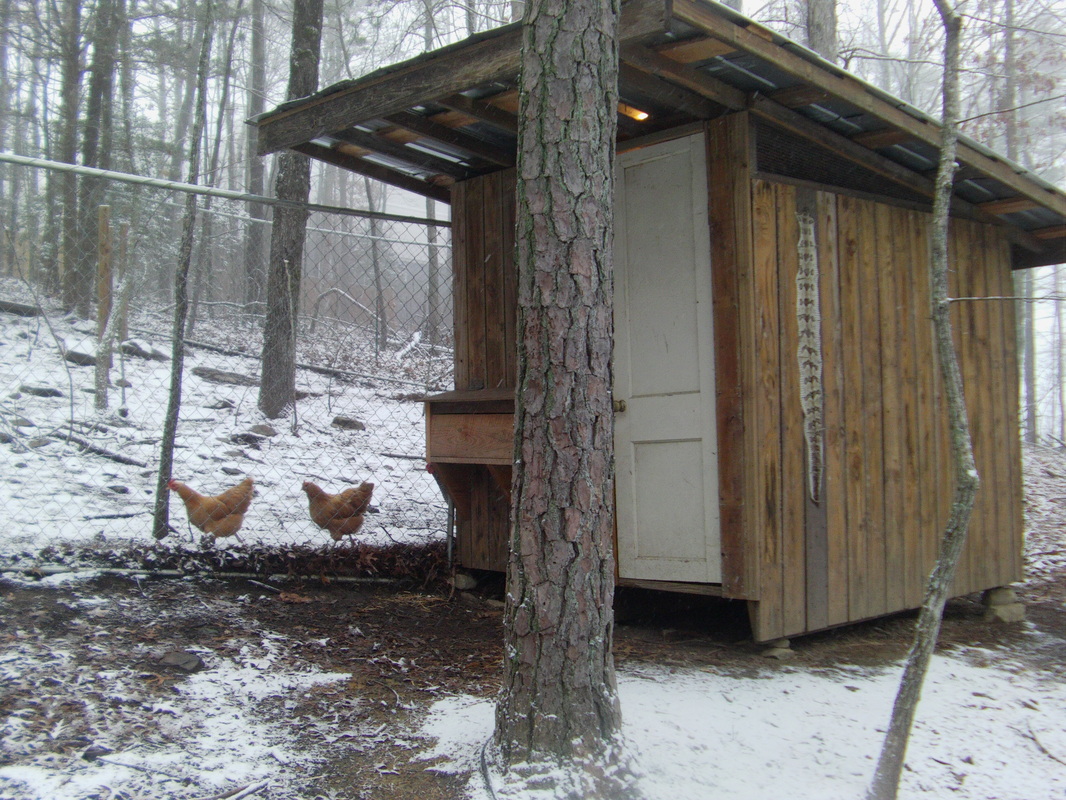
A hen house built to house a flock of 18-20 heavy layers. The 3 nest boxes are accessible from the outside, by lifting the lid to gather eggs. A small door on the far side -- not visible in this photo -- allows the chickens to come and go to their exercise yard.
As your chicks start to grow their feathers, they will also start to get too big to keep in the house... and that's when you need to get a hen house ready for them.
If you have a small outbuilding that can be converted to a hen house, that will save some on the labor and cost. But even if you have to build something from scratch, it doesn't have to be expensive. The hen house in the picture above was built in less than a week's time by 2 men, with a lot of salvaged scrap materials and about $50 cash actually spent. The purchased items were mainly screws and hardware cloth.
When a friend of ours suggested our two families go in together on a flock of laying hens, we started brainstorming about how to build a chicken house with our limited resources. The first step was to determine how big the building should be. According to the book Raising Poultry the Modern Way by Leonard S. Mercia, heavy layers need about 2 square feet of housing per bird. We planned on raising about 20 chicks, so we decided to make the floor space 8 by 8 feet, and with an outdoor exercise yard.
Another consideration was the fact that we live on property that does not belong to us, so the men decided to build the house on skids, allowing it to be moved to another location if need be.
A few features I wanted in the construction included: Wire flooring under the roost so the droppings would fall through, a small entrance for the hens to go in and out to the exercise yard, nests accessible for egg collection from outside, and as much security against predators as humanly possible.
Our son works on a construction crew with his father-in-law, who has a house across the street from us. As they tear out decks to build new ones, they bring the used lumber up to his house across the street. He stacks it up to use in building projects, and anything he can’t use he burns. Having secured permission to use wood from a couple of the stacks, my husband went over to take a look at what was there. He stacked the lumber next to our house, and the next sunny day he had free he started knocking nails out of the boards.
Using the recycled lumber, the men started building the hen house. When they needed a different size piece than what they had, they ripped a board or cut it shorter with the saw. The walls, likewise, were made from the boards. A hole was cut in the front wall to accommodate three nests, which were built and attached to the wall.
At my insistence, the men enlarged the lip on the front side of the three nests from 2 inches to 4 inches, to keep the straw from falling out (a pet peeve of mine with previous flocks of layers).
We compromised on the floor. I had wanted hardware cloth for most of the floor, to keep conditions sanitary. Not only can accumulated droppings increase the hazard of disease to the chickens, they can also carry such diseases as Histoplasmosis, which can infect humans. In the end, the men put hardware cloth in the area under the roost, where most of the droppings would fall, and made the front half of the floor of boards, to give solid footing to anyone who needed to go in the building.
I went out in the woods to see what I could gather to use for roosts. Before heading out, I measured the space and then took the tape measure with me to make sure I got poles that were the right size. I easily located several pieces of long, straight deadwood on the forest floor. Cutting them to just-a-little-longer than the right size with a small hand saw, I dragged back to the construction site one piece of maple and three cedars – all dry and hard, and just the right thickness for an adult chicken to comfortably grasp.
If I had realized the cedars were so easy to find, I would have got all cedars, because the cedar helps repel insects. As it was, we quickly cut and installed the poles I’d found, attaching them to two 1-by-4 boards nailed at a 45-degree angle on each side, over the hardware-cloth floor.
From our scrap materials, we provided an old door, and bits of tin for the roof. The tin was nailed on, a piece at a time, starting at the lower back end of the roof and overlapping as we went up toward the front. There were well over a dozen bits of tin, but with sufficient drop to the roof, and put on overlapping as we did, the roof has never leaked.
When the nests were installed on the front wall, the men cut a small piece of scavenged quarter-inch plywood for the lid. We had some big, heavy doors we’d rescued from the dump to use on cold frames, and we took the hinges off these to put on the nest lid. Then we cut a piece of heavy aluminum wire we had on hand for the pins to go in the hinges. The men added a nice curved edge to the lid so no one would be hurt bumping into the edge, which was next to the door.
A good overhang to the roof protects the building from the elements, and a larger 3-foot overhang at the front protects the person gathering eggs on a rainy day. A scrap of hardware cloth left over from the floor was put over a gap at the top of one wall, which allows air circulation from the eastern side. A 1 by 1 foot opening at floor level was cut into the west wall, to give the chickens access to the exercise yard.
The hen house was built sitting on small pillars of rocks, but the skids will allow it to be easily moved and transported to another location. An unused dog kennel serves as the exercise yard, bolted securely to the side of the chicken house.
With their new home finished, our 6-week-old chicks were introduced to the chicken house. I moved the heat lamp out there with an extension cord, because the nights were still pretty cool. I took one side off the cardboard box that had been their first home and set the 3-sided box on the floor of the hen house, right under the lamp. That gave them a corner in which to cuddle, and a wall against the wind that might blow in through the little chicken door and sometimes up through the wire floor under the roost.
Now, some 11 months later, all our chickens are alive and well, and thriving in our little hen house. The only expense in construction was some nails and the hardware cloth, which amounted to a little less than $50. Total construction time was about two days.
NEXT WEEK -- Chickens, Pt. 5: Care and feeding of the flock
If you have a small outbuilding that can be converted to a hen house, that will save some on the labor and cost. But even if you have to build something from scratch, it doesn't have to be expensive. The hen house in the picture above was built in less than a week's time by 2 men, with a lot of salvaged scrap materials and about $50 cash actually spent. The purchased items were mainly screws and hardware cloth.
When a friend of ours suggested our two families go in together on a flock of laying hens, we started brainstorming about how to build a chicken house with our limited resources. The first step was to determine how big the building should be. According to the book Raising Poultry the Modern Way by Leonard S. Mercia, heavy layers need about 2 square feet of housing per bird. We planned on raising about 20 chicks, so we decided to make the floor space 8 by 8 feet, and with an outdoor exercise yard.
Another consideration was the fact that we live on property that does not belong to us, so the men decided to build the house on skids, allowing it to be moved to another location if need be.
A few features I wanted in the construction included: Wire flooring under the roost so the droppings would fall through, a small entrance for the hens to go in and out to the exercise yard, nests accessible for egg collection from outside, and as much security against predators as humanly possible.
Our son works on a construction crew with his father-in-law, who has a house across the street from us. As they tear out decks to build new ones, they bring the used lumber up to his house across the street. He stacks it up to use in building projects, and anything he can’t use he burns. Having secured permission to use wood from a couple of the stacks, my husband went over to take a look at what was there. He stacked the lumber next to our house, and the next sunny day he had free he started knocking nails out of the boards.
Using the recycled lumber, the men started building the hen house. When they needed a different size piece than what they had, they ripped a board or cut it shorter with the saw. The walls, likewise, were made from the boards. A hole was cut in the front wall to accommodate three nests, which were built and attached to the wall.
At my insistence, the men enlarged the lip on the front side of the three nests from 2 inches to 4 inches, to keep the straw from falling out (a pet peeve of mine with previous flocks of layers).
We compromised on the floor. I had wanted hardware cloth for most of the floor, to keep conditions sanitary. Not only can accumulated droppings increase the hazard of disease to the chickens, they can also carry such diseases as Histoplasmosis, which can infect humans. In the end, the men put hardware cloth in the area under the roost, where most of the droppings would fall, and made the front half of the floor of boards, to give solid footing to anyone who needed to go in the building.
I went out in the woods to see what I could gather to use for roosts. Before heading out, I measured the space and then took the tape measure with me to make sure I got poles that were the right size. I easily located several pieces of long, straight deadwood on the forest floor. Cutting them to just-a-little-longer than the right size with a small hand saw, I dragged back to the construction site one piece of maple and three cedars – all dry and hard, and just the right thickness for an adult chicken to comfortably grasp.
If I had realized the cedars were so easy to find, I would have got all cedars, because the cedar helps repel insects. As it was, we quickly cut and installed the poles I’d found, attaching them to two 1-by-4 boards nailed at a 45-degree angle on each side, over the hardware-cloth floor.
From our scrap materials, we provided an old door, and bits of tin for the roof. The tin was nailed on, a piece at a time, starting at the lower back end of the roof and overlapping as we went up toward the front. There were well over a dozen bits of tin, but with sufficient drop to the roof, and put on overlapping as we did, the roof has never leaked.
When the nests were installed on the front wall, the men cut a small piece of scavenged quarter-inch plywood for the lid. We had some big, heavy doors we’d rescued from the dump to use on cold frames, and we took the hinges off these to put on the nest lid. Then we cut a piece of heavy aluminum wire we had on hand for the pins to go in the hinges. The men added a nice curved edge to the lid so no one would be hurt bumping into the edge, which was next to the door.
A good overhang to the roof protects the building from the elements, and a larger 3-foot overhang at the front protects the person gathering eggs on a rainy day. A scrap of hardware cloth left over from the floor was put over a gap at the top of one wall, which allows air circulation from the eastern side. A 1 by 1 foot opening at floor level was cut into the west wall, to give the chickens access to the exercise yard.
The hen house was built sitting on small pillars of rocks, but the skids will allow it to be easily moved and transported to another location. An unused dog kennel serves as the exercise yard, bolted securely to the side of the chicken house.
With their new home finished, our 6-week-old chicks were introduced to the chicken house. I moved the heat lamp out there with an extension cord, because the nights were still pretty cool. I took one side off the cardboard box that had been their first home and set the 3-sided box on the floor of the hen house, right under the lamp. That gave them a corner in which to cuddle, and a wall against the wind that might blow in through the little chicken door and sometimes up through the wire floor under the roost.
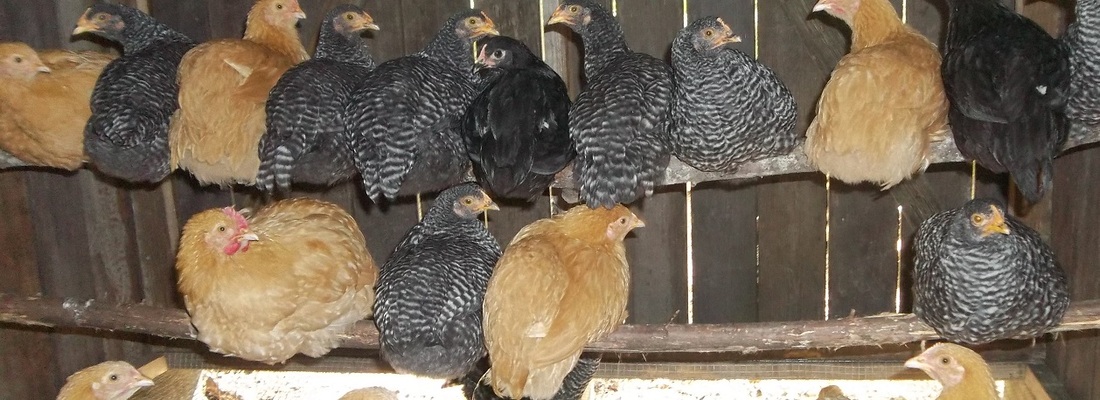
Now, some 11 months later, all our chickens are alive and well, and thriving in our little hen house. The only expense in construction was some nails and the hardware cloth, which amounted to a little less than $50. Total construction time was about two days.
NEXT WEEK -- Chickens, Pt. 5: Care and feeding of the flock

 RSS Feed
